Maker Activities:
100 Items on the 100th Day
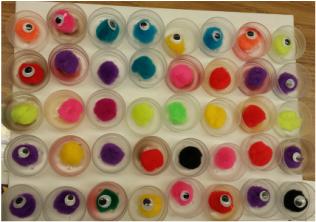
When I first told my students what their next challenge would be, the children fell into two categories. They were either very excited to get started or overwhelmed by the task. For the 100th day of school I asked my first graders to create something by using 100 items. Over the course of two days they would get 100 minutes to plan a design and create their one of a kind item. They would then share what they made with their fourth grade reading buddies.
The activity started weeks prior with a letter home to families requesting small items that could be used for our challenge. Children brought in shells, bottle caps, stickers, pasta, metal washers, pom-poms, and small rocks. I supplied a few additional items such as paper towel rolls, Pringel containers, canvas boards, chenille pipe cleaners, googly eyes, and anything from our classroom Creation Station. On the 99th day of school we were set with quite a variety of items to use.
Since we did not have a solid 100 minutes to create on the 100th day of school, I separated the challenge over two days. On the 99th day of school the children were given 45 minutes to lay out a plan for what they would build. If time allowed, they could begin to count out the 100 items. The excitement could be felt all around. The children were abuzz with discussion and planning. I carefully observed the children that seemed overwhelmed and watched others discuss the design and give advice on how to add more to their creation.
The next morning I had parents at the door wanting to see what we were doing. Many children had gone home and went into great detail about the challenges they faced in their task. Parents were so excited to see where their child was in the process of planning.
In primary grades, the 100th day of school is filled with many fun activities and our morning was no different. But, after recess, we applied all of our skills and ingenuity to Making in first grade. My favorite quotes from the day are:
“100 is actually a big number when you keep losing track and have to start over.”
“I only have 85 items. I still need a set of 5 and a set of 10 to get to 100. I wonder what I should add.”
“The timer is up? I only got to 65 items. I guess that this is a work in progress!”
Like all experiences there were lessons to be learned. For example, I learned that if you get Gorilla Glue on your hands you should not wash them with soap and water. The best thing that gets off the glue is rubbing alcohol. Oh, the lessons we will all learn as we make Making a part of our classrooms!
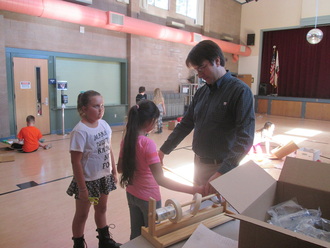
Circuits
|
For the past few weeks our
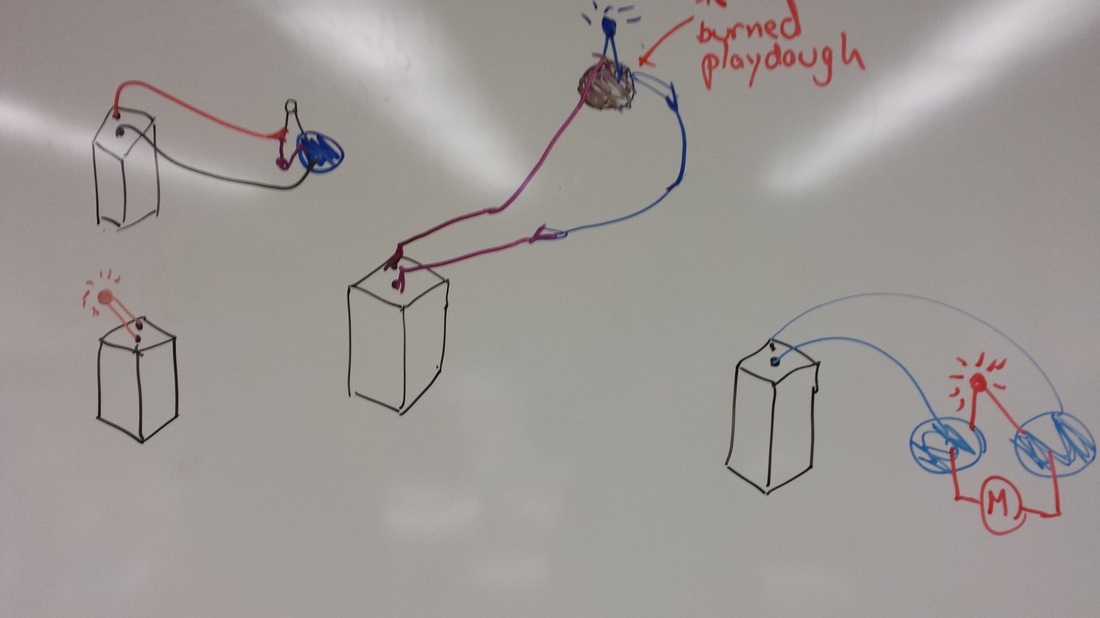
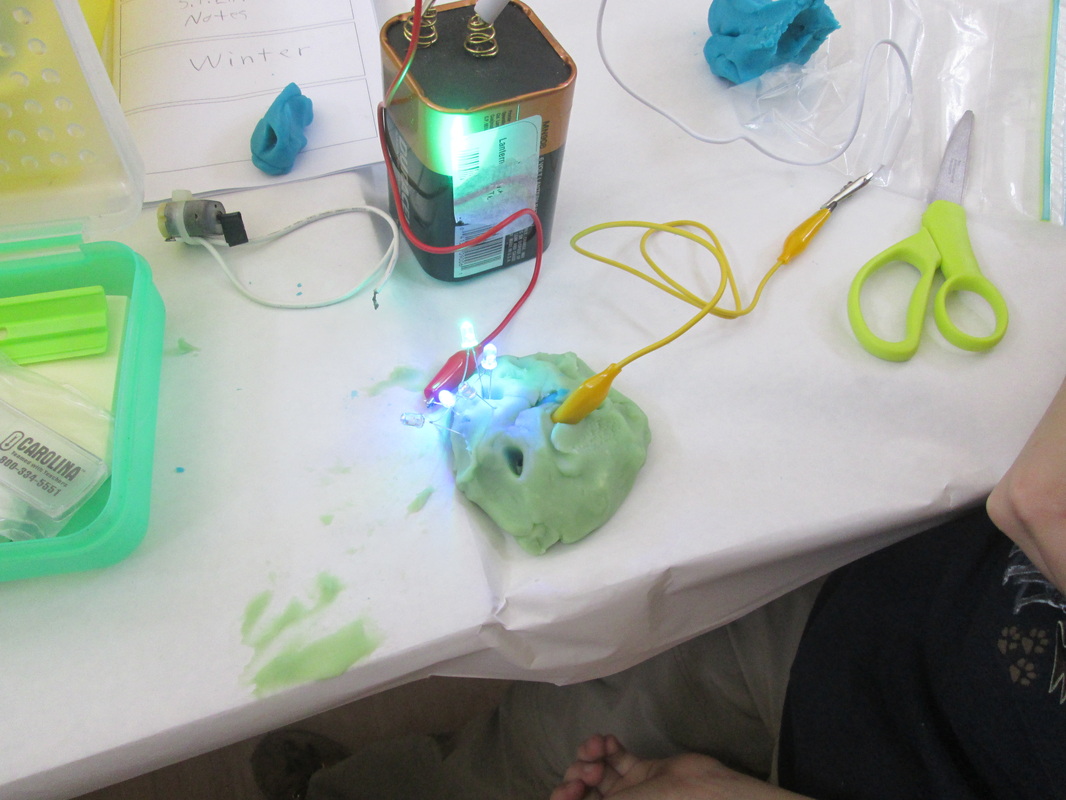
fourth graders have been focusing on circuits. Our unit started with creating a
simple circuit out of playdough, LED lights, and batteries. They were given the
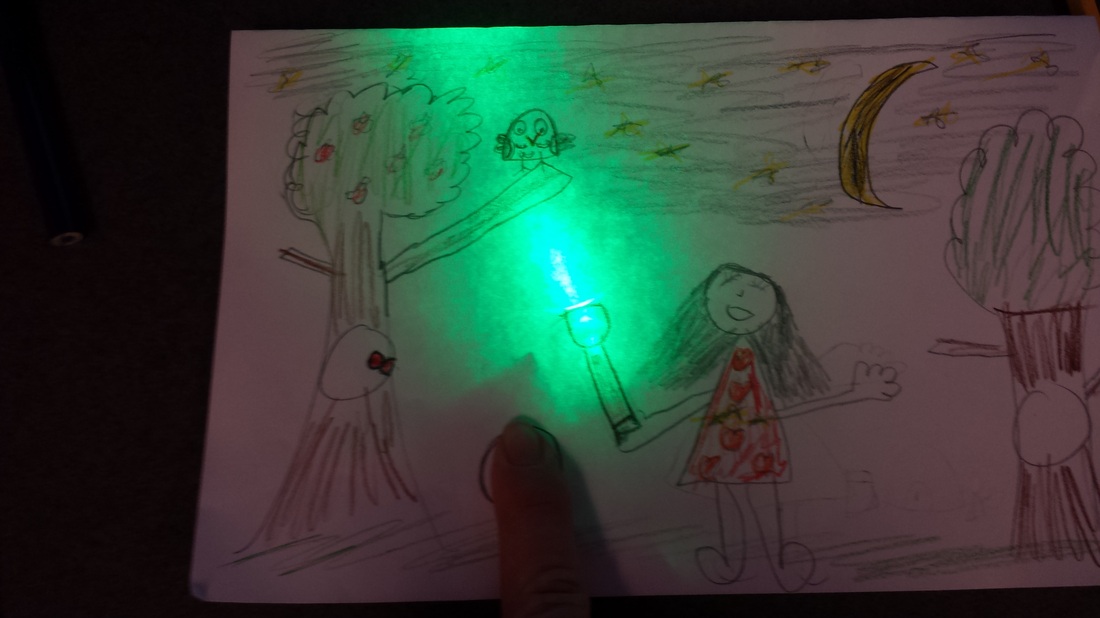
challenge “to make it work. Next, we added the complexity of paper circuits and
then on to scribble bots. With each activity the children were challenged and
it was wonderful to see them work through their frustration. The final step of
our unit of circuits is with reverse engineering. Parents very generously
donated a varity of unsued electric items that we will be taking apart. If you
have never taken something apart to simple see how it works, we strongly
recommend it!
|
|


First Steps
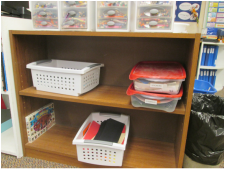
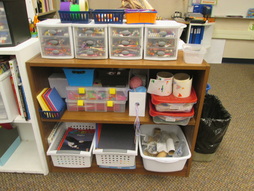
I firmly believe that part of being a Maker means that you are both open and courageous to trying new things. When I set out to create a space in my classroom, I felt overwhelmed with where to put all the supplies and wondered when we would find the time to add another activity into our day. I decide to start small. By carefully observing what the children naturally enjoyed I would build a space that allowed the students to engage and create at their level.
First graders love to build and invent new things. This is never more apparent than during our twice weekly “Choice Time”. A small space could easily be converted from random art supplies into a makerspace. I did not know what the children would need in this space, but I wanted everything to be open ended and I wanted them to be able to use all the tools in the space.
|
With a diverse bunch of learners who all have different skill sets, it is a joy to watch them create! The next addition to our space is going to involve reverse engineering. I can’t wait to see the children working together to take things apart! Our first dissection will be of a broken electric pencil sharpener.
|
|
Marble Run and Geoboard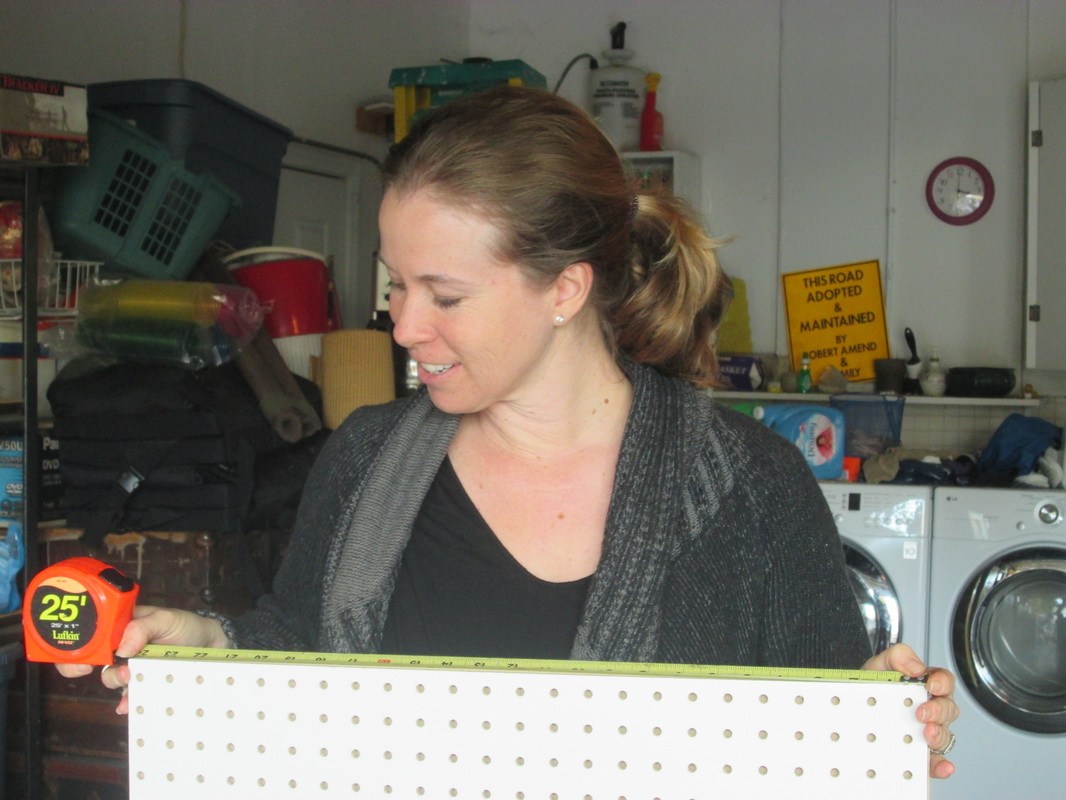
|
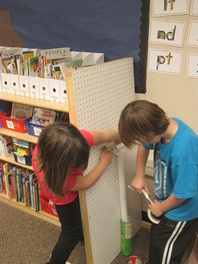
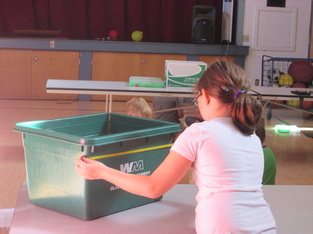
I believe that open ended activities are extremely important to fostering a Maker's creative side. There needs to be collaboration, time to share what was made, and plenty of opportunities to use the materials multiple times so that children can build on prior knowledge. The next activity that I felt would be a good addition to our creative time is both a marble run and geo board.
I had seen marble runs made out of pegboard and knew that I wanted to build one for my students. It had been a long time since I used a power tool and I was excited by the challenge. Then, just before I went to purchase the supplies, I happen to go the Santa Rosa tree lighting event. Museum on the Go, which is based out of Santa Rosa, had built a large geoboard out of plywood and nails. Children of all ages were working to create geometric designs on the board. It was a perfect addition because there are multiple skills sets that can be practiced by using both boards. Building the board was simple enough. I am not going to lie, gluing in all those pegs took many hours and a few trips to the hardware store. I bought two stores out and I was only half way down the board! I concluded that I needed to see if the children would use the board filled with pegs or if the empty space could be used for another marble run. I can’t wait to see how the children get the marble to move down the board! |
Access for Diverse Learners
The new opportunities to work with students on engineering and Making have presented some interesting observations about students’ work habits and willingness to persevere. As our fourth grade students worked on projects related to circuitry with LED lamps and motors, I found that students who frequently struggle academically were being very successful in accomplishing what they set forth to do. LED lights were lighting up, despite numerous short circuits (and burnt dough!) when we created squishy circuits. If they found one way to make things light up, they were more than happy to add to it, or find another way. When the class created scribble bots, these same students quickly created a complete circuit to turn the motor, but they weren’t satisfied with how the bots functioned. The students wanted to experiment and improve their bots by moving the motors and counterweight around, and they meticulously made changes until they were happy.
Conversely, I found some students to be quite satisfied with their first iteration of a design. It worked; it was good enough. Frequently, but not universally, these students were the ones who tended to not struggle in academic work. They were successful in accomplishing the task of “make it work” that my teaching partner and I frequently give to students, but “it works” was job accomplished. How else to “make it work” was an uncomfortable bridge for some to cross.
As my teaching partner and I discussed the work habits of our students, we both made similar observations in work habits and perseverance. Students that are used to struggling in their learning are more willing to allow themselves to struggle with improvements and revisions – their first design is not a firm ending point for them. Students that are used to instantaneously finding the solution are less apt to want to revise and look at a task differently.
It is amazing to see students of all abilities have success with engineering and Making. Students that may not as readily have “Aha!” moments in their day are experiencing them when Making. These students are always asking what the next challenge is, and look forward to the next project to work on. This positive experience in their school day is a boost to their self-esteem, and gives them a tangible sign of their hard work and perseverance paying off.
Spreading the Word
Working with a like-minded colleague (Patricia Ehn) on Making has been an absolute joy this past school year. We both had some ideas for creating a STEAM / Maker program, but were nervous about moving forward due to the logistics, time, and budget requirements. When our administrator gave us the go-ahead to work together, and a somewhat flexible budget, we were set. Discovering the Maker Certificate program was the icing on the cake, as it has opened up a plethora of new ideas and resources to us.
The work that we are doing has caught the interest of our colleagues. They’ve been hearing the positive feedback from students, parents, and our 4th graders’ classroom teachers. We feel the momentum is building and have been working to get the rest of the school involved in Making.
We pitched a school-wide engineering project to our colleagues and administrator back in February to do an egg drop around the time of the Easter holiday. The project was well received by everyone, but after giving praise responses usually ended up with “I need to figure out how to fit this in…” Fortunately, everyone was able to fit it in, and the project was a success.
To support our colleagues and their classes in Making, Patricia and I wrote a comprehensive unit for the egg drop detailing the engineering process that has worked for our STEAM classes. We wanted to deliver something to support teachers and students new to the process, but also give them the experience our students have become used to over many cycles of the engineering process. Our final unit allowed room for students to brainstorm, collaborate, design, build, test, and revise, and gave teachers and students clear guidelines and expectations for the process.
After the egg drop, interesting in Making has increased throughout the school. Patricia and I have been individually discussing with colleagues how we might get Making into their classrooms. We keep asking questions about what might it look like? Who would be teaching it? When would we fit it in? How would we integrate it as a part of the classroom curriculum?
As the school year is in its final months, we’re hoping to solidify a plan for next year. We have a few ideas of how to keep the momentum for Making going, but are still grappling with how to effectively expand the program. (Much like instilling perseverance in our students, we must do so too!) We’re teaming in the coming weeks with another colleague and her students for a cardboard creation project, so some expansion is taking place. We want to see more as time goes on, but we are taking steps in the right direction as we end the school year.
Goggle Prints on My Face? Yeah, I’m Doing Science!
One of the recent challenges my teaching partner Patricia and I presented to our students was to design catapults to launch a Lego brick as far as possible. The challenge in this for us was to better familiarize ourselves with the Next Generation Science Standards. We wanted to give our students an engineering challenge, but also explore how its components integrated with the NGSS.
We arrived at having students create catapults for a number of reasons. First, it provided a platform for students to work on a task in the engineering and design standards. In particular, we wanted students to focus on the process of testing and making revisions. We knew students would most likely have room to revise in an activity like this. Second, we looked into the science behind the catapult. Potential energy is stored and suddenly released as kinetic mechanical energy in a catapult. The fourth grade standards focus on the movement and transfer of energy, so it was a perfect fit.
One thing that we struggled with was creating the background knowledge for students to discuss the storage and movement of energy in a machine. Our solution to this problem was to present a mini-lesson on simple machines (levers, pulleys, incline planes, wedges, wheels and axles, and screws). We discussed how these machines worked, and how they changed the movement of energy. Students then designed the catapults based on the simple machines.
Students worked collaboratively in groups of three to design their catapults. We have a variety of designs, using axles, levers and wedges to accomplish launching the Lego brick. Students had marginal success at first with many skyward launches, but after analyzing their designs (and realizing the brick goes where the launcher stops), they were able to revise and re-test them. Before the final launch, students presented their catapults, discussed which simple machines they integrated into their design, what variables they altered during the revision process, and discussed how they put potential energy into their catapult for release.
On launch day, students were thrilled to get to wear safety goggles (and turned the “raccoon print” left of their faces by the goggles into a badge of having done science), and were able to launch three times each. We kept a class chart, which if time allowed could have easily converted to a math activity on data landmarks. Launches ranged from negative distances, to over 30 feet. It was quite an accomplishment for using recycled materials, paint stirrers, popsicle sticks and tape.
This exercise in designing a lesson around the NGSS with engineering and energy components shows how science, engineering and Making all fit together. The union of these areas also provided for natural bridges to math and language arts skills too. The students had fun, and it was enlightening to observe them struggle, and then revise their work. Students demonstrated perseverance and patience throughout the process. For those who were not as successful with their launches, final chatter was about how to revise yet again, not how theirs didn’t work. Students are remaining analytical throughout the process, ready to continue engineering.
First Steps with Students
|
The Activity:
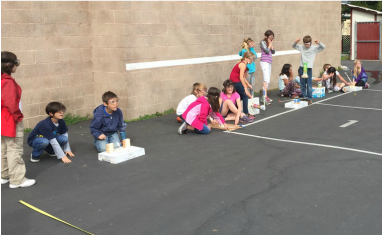
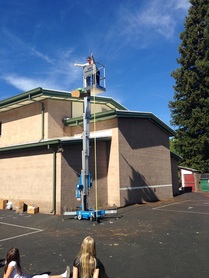
In our STEAM class, one of the first items our 4th graders created was a “pumpkin protector”. Students collaborated in groups of 3 to craft a device out of recycled items to protect a pumpkin from a fall. To test this project, we enlisted the school principal to go up in our utility lift to test students’ creations. In adapting this activity for our students, one of our key goals was to foster an environment to allow for teamwork. We encouraged students to be open to one another’s ideas, and to compromise by incorporating aspects of each individual’s design ideas into the group’s design. |
|
|
The Process:
We asked the school community to make donations of materials for our build: Paper towel and toilet paper rolls, plastic bags, shipping materials, tape, cardboard, balloons, paper bags, and other materials that could potentially be re-purposed. After showing students what happens to a pumpkin dropped from 10 feet in the air, they were then asked to look at all the materials available, and individually formulate two plans of how to use at least 4 of the materials to protect a pumpkin from the same fall. Students then convened in their groups to share the favorite facets of their ideas; from this they were asked to create their group plan, and a materials list. Once we approved their plan, students had about 1.5 hours to construct their protection devices, making sure that they could easily insert and remove the pumpkin, and that it could fit in the classroom recycle bin as a size constraint. Other than this, students were free to design as they wished, with the materials available as their only other limit. The students then tested their designs by having the principal drop them from 10 feet up, then 20 feet for the ones that survived. |
|
The Outcome:
This was one of our first activities that was open-ended in the process and solution. The common thread was the engineering problem that needed to be solved. Students entered with different ideas for how to make a device to complete the task, and out of the dozen devices that were created, a dozen unique solutions resulted. Students were asked to investigate each other’s work, and replicate and adapt it as necessary to suit their ideas. “Copying” was encouraged as a compliment to the group who originated the design. As a result, the typical classroom quibbling about “copying” turned into groups discussing the pros and cons of their design elements versus the other designs they saw. We framed a split pumpkin as not a failure, but an opportunity to improve upon a design. While there was disappointment from a few students, most conversations included phrases such as “next time”, or “this part was loose/moved/crushed.” Our summative activity asked students to analyze what they could change, or what helped in making the protector function well. Students had excellent insight to what could be changed, or why things worked. We hope to later apply this new knowledge to creating protectors for an egg drop in the spring. This initial foray into Making was successful for both the students and us as educators. The students were engaged, having fun, collaborating, and freely exchanging ideas. Differing ideas and prior knowledge of students combined to reach an outcome. We were able to observe this process, and constantly be amazed by the ideas and interactions of our students. Creativity was abounding, and everyone had fun! (Unless you were a pumpkin. Splat!) |
|
New Challenges
|
The phrase “practice what you preach” comes to mind as I think about how to encourage my students to become Makers. Making involves taking some risks, trying new ideas, learning new skills, and creatively deriving solutions to problems. Understanding the process that students go through to do this involves engaging in the process yourself.
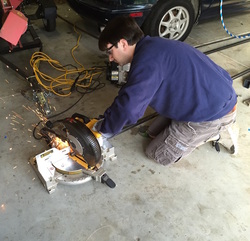
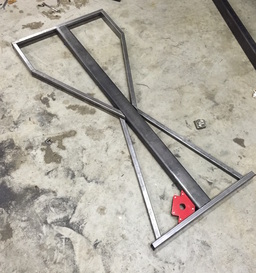
When I was in college, I took a welding class to pick up an extra unit for a full class load. I’ve seldom used this skill in the almost 15 years since I took the class, but I’ve always wanted to take on a project to apply and improve the skill. The project that I’ve started is building a set of go-karts with a friend of mine. We found some general ideas on the Internet for a chassis, but to keep costs down and make the project interesting we’re trying to fabricate as much as we possibly can. |
|
The process has been tiring, dirty, messy, slow, and at times frustrating. The chassis cross members require cuts at angles over 45 degrees – not allowing the use of a chop saw. The oversized pieces couldn’t be cut with a small blade, requiring the use of a 10” cut-off wheel, which vibrates due to its size, ruining dimensional tolerances. My friend has little welding experience, and mine is over a decade out of practice – we’re running test welds and getting better as we go. We also have had a few disagreements about how to handle not having the correct tool, or how to improvise a solution when something didn’t work.
These experiences parallel what students go through as Makers. They get frustrated. Things don’t work. They disagree about how to go forward in the process. From this, as Makers, they persevere. They test new ideas. They find faults and revise them. They reach the product they desire. As of writing this, I’m still very much in the middle of the building process. I sometimes wonder why I got involved with this project - it’s putting me on the edge of my comfort zone for skills and patience. I’ve learned a lot so far. My welding is getting better, and the more steel I cut the more exact and clean the cuts turned out. Making requires constantly tackling new challenges, whether it be lighting up an LED for the first time, or building a small vehicle. |
|
